
dependency 설정
dependencies {

    implementation 'org.springdoc:springdoc-openapi-starter-webmvc-ui:2.3.0'

}
application.propertise 나 .yml 에서 URL 주소 설정 및 데이터 타입 설정, ui 설정 등 기타 설정도 가능하다.
예시)
springdoc:
  title: 'side-api'
  version: '1.0'
  api-docs:
    path: /v3/api-docs
  default-consumes-media-type: application/json
  default-produces-media-type: application/json
  swagger-ui:
    operations-sorter: alpha
    tags-sorter: alpha
    path: /swagger-ui.html
Controller
@RestController
@RequiredArgsConstructor
@RequestMapping
@Tag(name = "(마이 컨트롤러)", description = "(마이 컨트롤러)")
public class MyRestController {
private final VideoRepository videoRepository;
private final ChannelRepository channelRepository;
@GetMapping("/channel")
@Operation(summary="채널 리스트 조회", description="채널 전체 조회")
@ApiResponses( value = {
@ApiResponse(responseCode = "200", description = "성공", content = @Content(schema = @Schema(implementation = List.class ))),
@ApiResponse(responseCode = "400", description = "에러", content = @Content(schema = @Schema(implementation = List.class)))})
public ResponseEntity<List<Channel>> getAllChannel() {
List<Channel> all = channelRepository.findAll();
return new ResponseEntity<>(all, HttpStatus.OK);
}
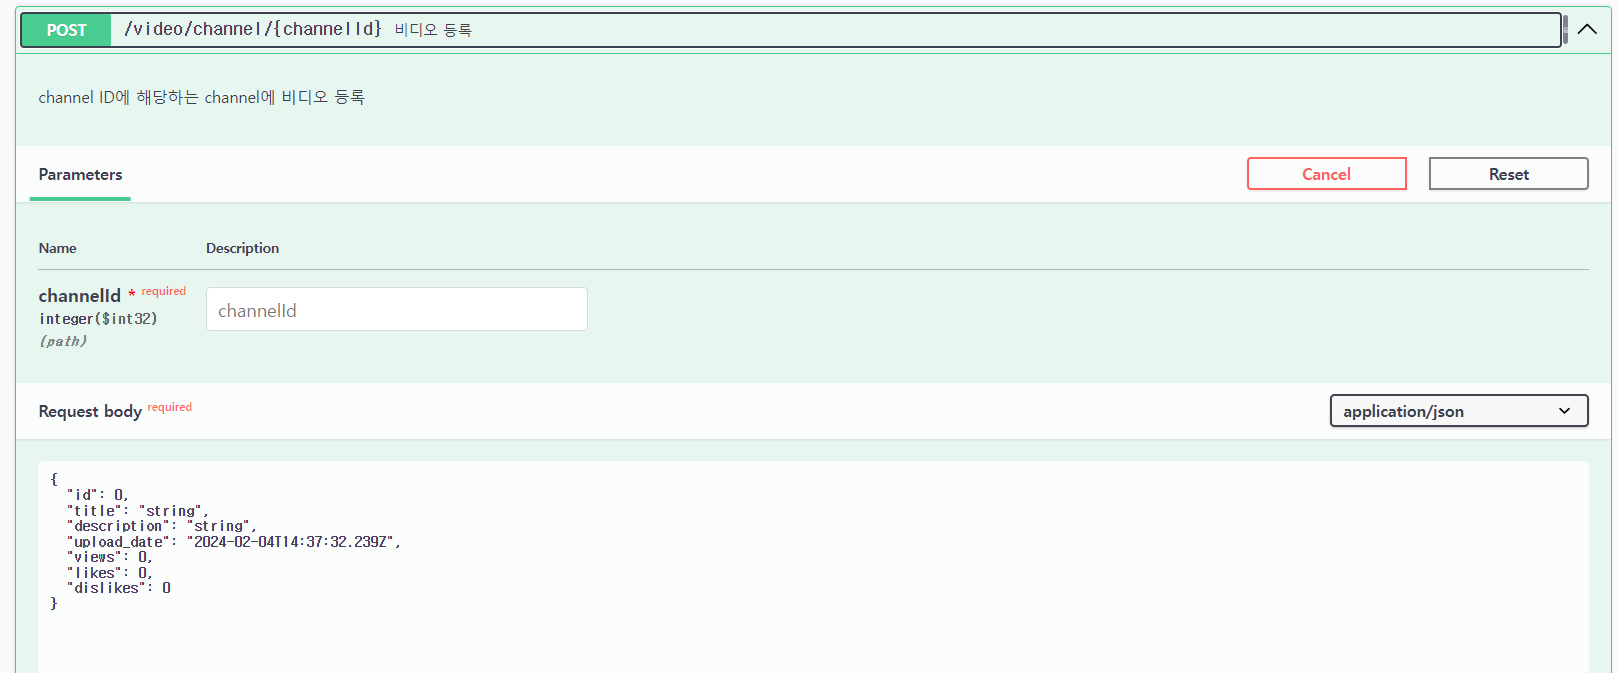
@PostMapping("/video/channel/{channelId}")
@Operation(summary="비디오 등록", description="channel ID에 해당하는 channel에 비디오 등록")
@ApiResponses( value = {
@ApiResponse(responseCode = "200", description = "성공", content = @Content(schema = @Schema(implementation = List.class ))),
@ApiResponse(responseCode = "400", description = "에러", content = @Content(schema = @Schema(implementation = List.class)))})
public ResponseEntity<Video> saveVideo(@RequestBody Video video, @PathVariable("channelId") Integer channelId) {
Channel channel = channelRepository.findById(channelId).orElseThrow();
video.setChannel(channel);
Video save = videoRepository.save(video);
return new ResponseEntity<>(save, HttpStatus.OK);
}
/**
이하 생략
**/
}
@Tag를 통해 컨트롤러 별 태그를 설정 할 수 있다.
@Operation(summary="채널 리스트 조회", description="채널 전체 조회")
- 메서드별 기능 및 구분을 상세하게 입력 할 수 있음
@ApiResponses
- API의 응답코드와 응답값을 지정할 수 있음
스웨거 페이지

조회에 대한 응답값

이로써 애플리케이션의 REST API 를 문서화할 수 있고
테스트로 요청을 보내고 응답을 수신하여 API를 즉각 테스트할 수 있다
PostMan과 유사하지만 더 편리한 점은 API의 모든 엔드포인트를 살펴볼 수 있다
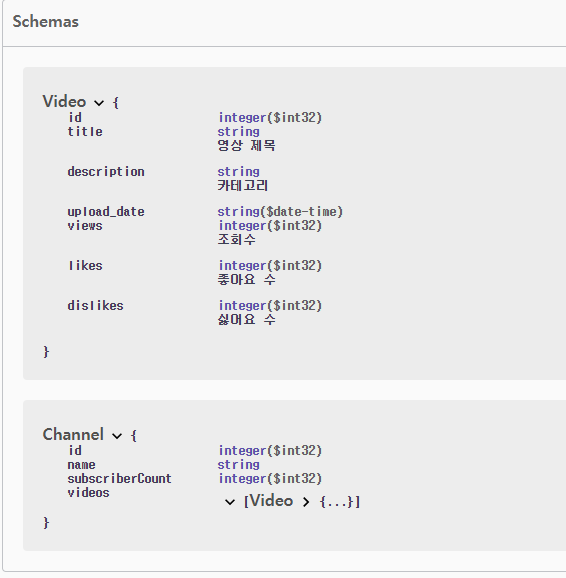
@Schema
@Schema를 적용한 프로퍼티와 하지 않은 프로퍼티를 비교하기 위해 Video 엔티티에만 적용하였다.
적용하면 아래와 같이 swagger 화면에서 확인할 수 있다.
@Getter
@Setter
@NoArgsConstructor
@Entity
@Table(name = "videos")
public class Video {
@Id
@Column(name = "video_id")
private int id;
@Schema(description = "영상 제목")
private String title;
@Schema(description = "카테고리")
private String description;
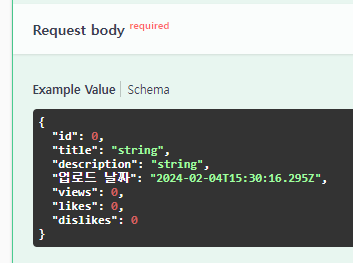
@Schema(name = "업로드 날짜")
private LocalDateTime upload_date;
@Schema(description = "조회수")
private int views;
@Schema(description = "좋아요 수")
private int likes;
@Schema(description = "싫어요 수")
private int dislikes;
@ManyToOne(fetch = FetchType.LAZY)
@JoinColumn(name = "channel_id")
@JsonIgnore
private Channel channel;
}
Schema를 적용한 요청 및 응답 값에는 아래와 같이 편리하게 확인이 가능하도로고 해준다.
@Schema(description = "") 케이스
@Schema(name= "") 케이스

'Spring' 카테고리의 다른 글
| N+1 해결 (QueryDSL) (0) | 2024.02.11 |
|---|---|
| 프로젝트 QueryDSL 적용기 (0) | 2024.02.08 |
| Spring Profile (0) | 2024.02.03 |
| MVC 모델 타임리프 폼 (체크 박스 / 셀렉 박스 / 라디오박스) (0) | 2024.02.02 |
| Spring MVC 구조 뜯어보기(2) - Spring MVC 사용 (1) | 2024.01.21 |